Looking for fun & easy sensory bin ideas for your toddlers. Find 21 minimal setup and fun sensory bins that you can create for your little ones.
Trying to keep my little toddler entertained without her losing interest quickly was a really hard thing to do. Every time I would sit down to do an activity with my toddler, I would find her restless and eager to move onto something else quickly. In all this, I was getting overly tired from having to play with my toddler all the time without getting any break and as well I was not successful in finding anything that my daughter would stick to for long.
It was not until I discovered the power of a simple sensory bin activity for my toddler, that it completely changed my life for good. One day as I was cooking and my daughter, as usual, was hanging by my leg bored and cranky, I took a big plastic bowl, threw in some flour, brown sugar and a whisk and a spoon and told my toddler to make me a cake. That was it, she played with it for hours. I could not believe it.
For so long, I was investing in toys, games and a lot of energy of mine, to entertain my daughter to only find that sensory bin was my best tool to keep her busy. Since then, I did everything in my power to understand the basics of a sensory bin, tools needed and tricks on how I can control the mess as well as tips on how to reuse all the sensory bin ingredients again and again.
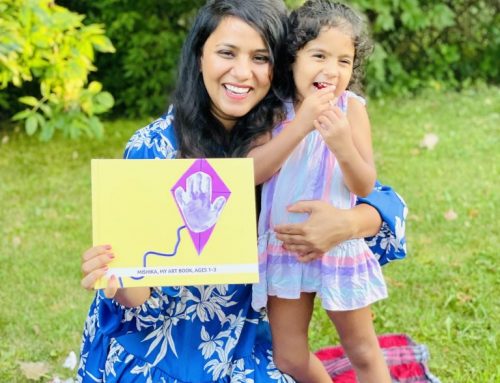
Related. Interested in fun & learning art & craft activities for your toddlers. Sign up here to get a pack of 25 activities for toddlers that requires minimal setup, are easy to do and teaches kids important life skills like sensory development, motor skills, creativity and a lot more.
Setting up a sensory bin is so simple, you don’t need a ton of stuff.
I am so glad that slowly over the period of time while doing these activities with my toddler I have managed to create a craft supplies library that has all the basic things that I need to do these activities with my toddler including sensory bin activities supplies.
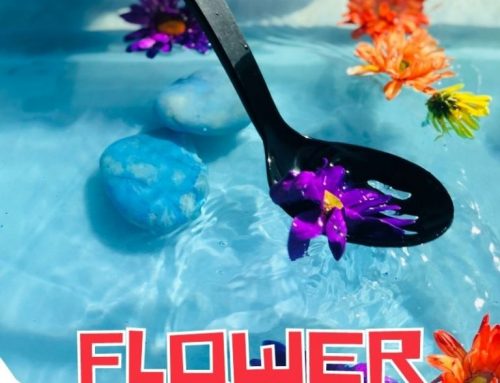
Related. Wondering how to introduce sensory bins to your toddler? Find helpful tips and tricks here on how to introduce sensory bins to toddlers.
Below I have shared 21 minimal setup and fun sensory bin ideas for your toddlers. And if you are looking for more ideas on the sensory bin, then do check out this book. It’s packed with some fun ideas for sensory play for toddlers and preschoolers.
Also, a few experienced tips before you attempt any sensory activity with your toddler for the first time
- Learning to play with sensory bins is like learning to eat for your toddlers. Be patient and slowly teach them how to use the tools
- Be prepared for the mess!
- Use an old shower curtain liner or a plastic mat to set up the activity on. So that the mess is contained and as well it’s easier to clean
Pin this post to keep it handy all the time!
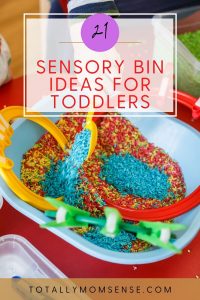
So let’s get started! Here are 21 fun & learning sensory bin ideas for your toddlers that can keep them entertained for long and give you some downtime that you need.
- Soap Dough – 3 cups of soap flakes (or grated soap bar), 1 1/2 cups of water. Mix together for some clean fun.
- Sandy Dough – 2 cups of sand, 1 cup of cornstarch, 1 1/2c of water. Mix all the ingredients over medium heat and knead until dough-like.
- Salt Dough – 2 cups of salt, 1 cup of cornstarch, 1 cup of water, food colouring of choice. Mix all the ingredients over medium heat until it pulls away from the sides and gathers in a ball. Knead until soft and pliable.
- Clay Dough – 1 cup of corn starch, 2 cups of baking soda, 1 1/2 cups of water, food colouring of choice. Mix cornstarch, baking soda, water and food colouring in a saucepan over medium heat. Knead until it has a dough-like consistency.
- Oobleck – 1 1/2 cup corn starch, 1 cup water, food colouring or dump cornstarch into a tub and allow the children to squirt coloured water onto the piles of cornstarch. As the water adds up, it turns into oobleck.
- Coffee sand – 4 cups dried, used coffee grounds, 2 cups of cornmeal, 1 cup of flour, 1/2 cup of salt. Dry out the used coffee grounds by placing them in a big pan or cookie sheet, and putting them over low heat for about an hour. Mix all the ingredients together in your sensory tub.
- Playdough – 3 cups of flour, 1 1/2 cups of salt, 3 cups of water, food colouring, 5 tablespoons of oil, 6 tsp cream of tartar (double the recipe for more kids). Mix all of the ingredients together in a bowl by hand, or with an electric hand mixer. Pour the dough mixture into the pan on the stove over medium heat, stirring constantly. Take out of the pan and knead. When cool, store in an airtight container or Ziploc. *Use coffee or drink mix to make it smell yummy!
- Papier-mâché -Mache – 2 cups cold water, 1 1/2 to 1 3/4 cups of flour, newspaper, cut or torn into strips. Mix water and flour in a large bowl, with a wire whisk until smooth. The mixture should be the consistency of heavy cream. Coat your mould (such as an inflated balloon) with one layer of the newspaper strips that have been dipped in water. Then dip strips into the flour mixture and lay over the first layer until the mould is well coated. Allow drying completely until your mould is hard. If desired, add another layer of newspaper strips that have been dipped in the flour mixture and allow to dry. Paint over the strips in any design or colour of your choice.
- Applesauce cinnamon dough – 1/2 cup cinnamon, 1/2 cup applesauce (not chunky), 1/4 cup glue
- Paper clay – 1 cups construction paper scraps (sorted by colour), 4 1/2 cups of water, 1/2 cup flour. Tear construction paper into small pieces. Pour water and paper scraps in a blender. Blend for 20 seconds or until it turns pulpy. Drain and squeeze excess water out of the mixture. Mix flour and the remaining 1/2 cup of water in a small bowl until blended. Slowly add the flour mixture to the paper pulp. Knead until forms a dough. Let finished product dry 1-2 days.
- Wood Dough – 1 cup clean, well-softer sawdust, 1/2 cup of flour, 1 tsp liquid starch, 1 cup of water. Mix ingredients together in a bowl until a stiff dough is formed. Add extra water Incase the dough is too dry. Allow the wood dough to dry for 2-3 days. Sandpaper can be used to smooth the wood dough after it is completely dry. Finished pieces can be painted or stained with a mixture of food colouring and water (6 drops of food colouring to 1tspn of water)
- Cotton clay – 3 cups cotton ball, 2 cups water, 2/3 cups flour, 5-7 drops food colouring. Tear cotton balls apart into small pieces. Mix water and cotton together in a medium saucepan. Slowly stir in the flour. Continue stirring and cook over low heat for 5-7 minutes until the mixture begins to stiffen. Remove saucepan from heat and place the cotton clay on a thick cloth towel or several layers of paper towels to cool. Allow finished products to dry for a day.
- Craft clay (good for beads and small figurines) – 1 cup cornstarch, 1 1/4 cups cold water, 2 cups baking soda. Combine cornstarch and baking soda in a small saucepan. Add water and stir until the mixture is smooth. Heat mixture for 5 minutes over medium heat. Stir until it begins to thicken and turn to the dough. Remove from saucepan and allow it to cool. Knead dough 2-3 minutes. Let finished creation air-dry until hard.
- Sweet-smelling goop – mix together flour and baby oil
- Yarn sculptures – glue, yarn. Place different lengths and colours of yarn in your sensory bin with glue and a little bit of water.
- Sand paint – paint, glue, sand. mix equal parts paints and glue, fold sand into mixture.
- Extra bright paint – 2 cups dry paint, 1 cup liquid soap (clear/white), 1 cup liquid starch. Mix paint and soap together, then add liquid starch.
- Flour paint – Flour, liquid paint, water. Combine equal parts of flour and paint. Add drops of water until it achieves desired consistency.
- Textured finger paint – 1 cup of flour, 2 tsp liquid soap, 2/3 cups of water, food colouring of choice
- Oatmeal fingerpaint – white glue, liquid paint, oatmeal. Combine equal parts of glue and paint. add oatmeal
- Cornmeal fingerpaint – cornmeal, paint, glue. One part cornmeal, one part paint, one-half part glue
Sensory bin basics: Everything you need
Find a complete list of what you need to set up a simple sensory bin set up at home
Also creating a simple craft supplies library at home for your little one can save you a ton of time when you these art and craft activities with them. Read this post here to find the basic craft supplies that one must have in their library.
Which sensory bin activity are you going to try with your toddler?


Leave A Comment